Webpack integration into Nette projects
In the age of single-page-application, developers build webapps with help of
frontend frameworks instead of classic templating systems. One of the tools that
enable us to build such applications is Webpack. It allows structuring
frontend apps in the nice, maintainable way using
import/export keywords. Resulting bundles needs
to be served using standard HTML document. And Nette is a great framework to
create such a document for you.

In this tutorial, we will teach Nette to serve Webpack bundles. We start with a small sandbox project that contains AJAX form for sending letters. But you can of-course extend your existing project too. Our webapp looks like this:
We use Naja library for enabling AJAX in this app. We will not go through the code of the form. We will focus only on the frontend aspect of the app. If you're interested in how letter form is created and “AJAXified”, we have Github repository ready for you.
Naja is loaded in main @layout.latte template:
	{block scripts}
	<script src="{$basePath}/js/lib/Naja.js"></script>
	<script src="{$basePath}/js/app.js"></script>
	{/block}
We can see we are including two javascript files – the library itself and code to initialize it.
We want to also include the famous netteForms.js file to
validate our letter form before submitting it. Usually this file is loaded from
public server like this –
<script src="https://nette.github.io/resources/js/3/netteForms.min.js"></script>.
But let's say we want to serve it together with files already hosted by our webapp:
	{block scripts}
	<script src="{$basePath}/js/lib/Naja.js"></script>
+	<script src="{$basePath}/js/lib/netteForms.js"></script>
	<script src="{$basePath}/js/app.js"></script>
	{/block}
This is only a very small webapp, but you can see we're getting into a point where managing scripts by hand can become uncomfortable. Bigger apps are composed of tens or even hundreds of javascript files. Managing them by hand will quickly become impossible. Let's call Webpack for help…
Building the Webpack bundle
We use Webpack to combine all three files into a single bundle file. Since Webpack is a tool written for Node.js, we must extend our project of its runtime and configuration. The most straightforward way is just install needed Node.js packages in the root of the project:
yarn add --dev cross-env webpack webpack-cli
This command will install Node.js packages with all dependencies into
node_modules folder. It will also create package.json
and yarn.lock files in the root of the project. We need to tweak
package.json – add proper meta data, but mainly
scripts section, which enables run Webpack from console:
{
+  "name": "nette-webpack-example",
+  "license": "MIT",
+  "private": true,
+  "scripts": {
+    "build": "cross-env NODE_ENV=production webpack"
+  },
  "devDependencies": {
    "cross-env": "^6.0.3",
    "webpack": "^4.41.5",
    "webpack-cli": "^3.3.10"
  }
}
With Webpack we also need to install our libraries as Node.js packages too:
yarn add naja nette-forms
Now you can/should delete www/js/libs folder completely. Before
running Webpack we need to add cofiguration file:
webpack.config.js
const path = require('path');

module.exports = {
  entry: './www/js/app.js',
  mode: (process.env.NODE_ENV === 'production') ? 'production' : 'development',
  resolve: {
    extensions: ['*', '.js', '.jsx']
  },
  output: {
    filename: 'bundle.js',
    path: path.join(__dirname, 'www', 'assets'),
  },
};
We also need to tweak our www/js/app.js file so it properly
initializes both libraries:
import naja from 'naja';
import netteForms from 'nette-forms';

window.Nette = netteForms;

document.addEventListener('DOMContentLoaded', naja.initialize.bind(naja));
netteForms.initOnLoad();
You can see how we are importing both libraries via import
keyword. This is enabled because app.js will be processed by
Webpack. It understands the import keyword and will inline all
needed files in the correct order into the final bundle.
Now build bundle by calling Webpack from a console in the root of the project:
yarn build
As we see from the configuration resulting bundle will be placed into
www/assets folder. We need to fix the link in
@layout.latte:
	{block scripts}
-	<script src="{$basePath}/js/lib/Naja.js"></script>
-	<script src="{$basePath}/js/lib/netteForms.js"></script>
-	<script src="{$basePath}/js/app.js"></script>
+	<script src="{$basePath}/assets/bundle.js"></script>
	{/block}
Application is fully functional, and our javascript sources are managed by Webpack:
Smart development with contributte/webpack
As your application will grow you will want Webpack to rebuild your bundle on demand during development. For that purpose, there is a Node.js package called Webpack DevServer It will watch your sources and rebuilds the bundle file for you automatically. Install the Webpack DevServer package:
yarn add --dev webpack-dev-server
Now add a new script entry to the package.json:
  "private": true,
  "scripts": {
+   "start": "webpack-dev-server --config ./webpack.config.js --mode development",
    "build": "cross-env NODE_ENV=production webpack"
  },
  "dependencies": {
and tweak to Webpack's configuration:
  devServer: {
    publicPath: '/assets/',
  },
You can now start dev-server in console, it will start watching your frontend sources and rebuilds bundle accordingly…
yarn start
Dev-server is not emitting bundle to the filesystem, but instead, it
serves it as any other web server (as a javascript file under configured
host:port/path).
But remember, we linked our bundle statically in @layout.latte.
How does Nette know which bundle to use? The one we build with
yarn build which is sitting in www/assets folder on
the filesystem or the one provided by dev-server.
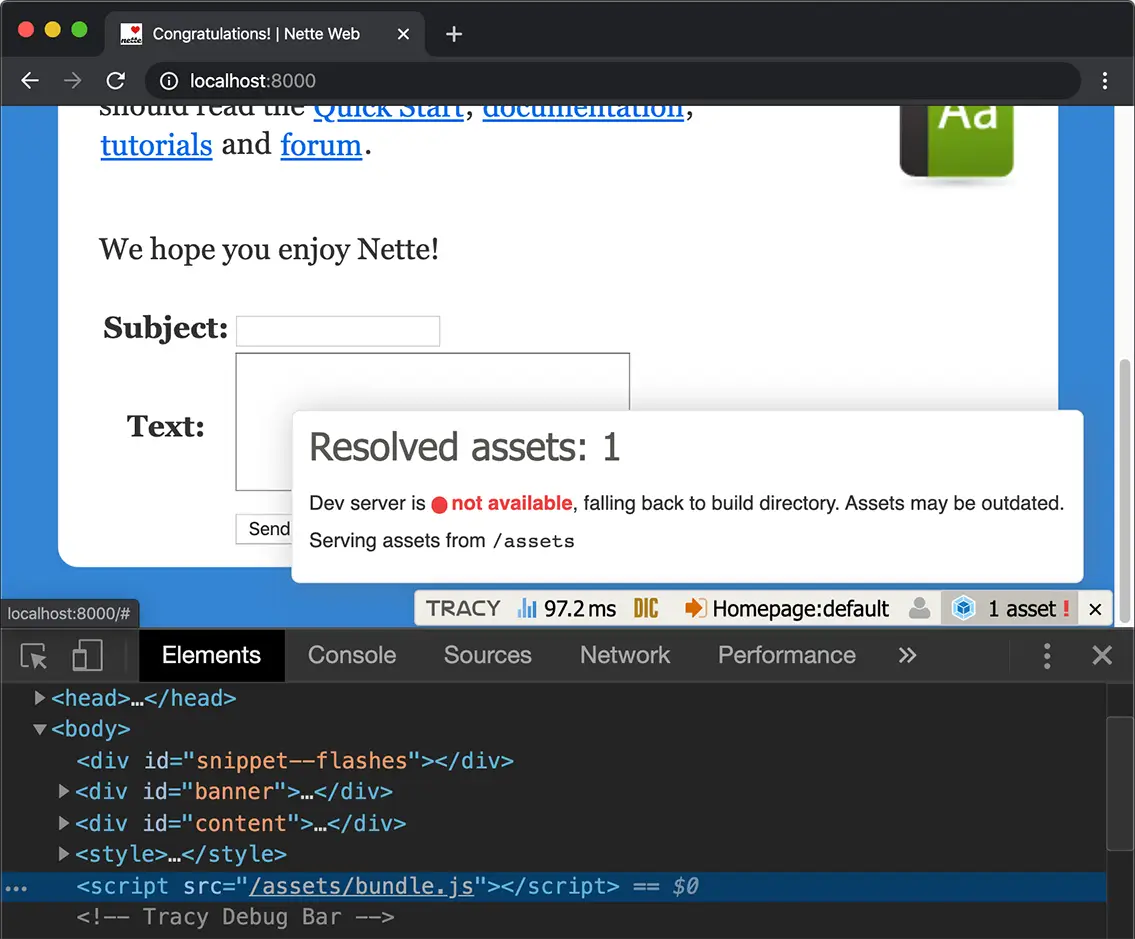
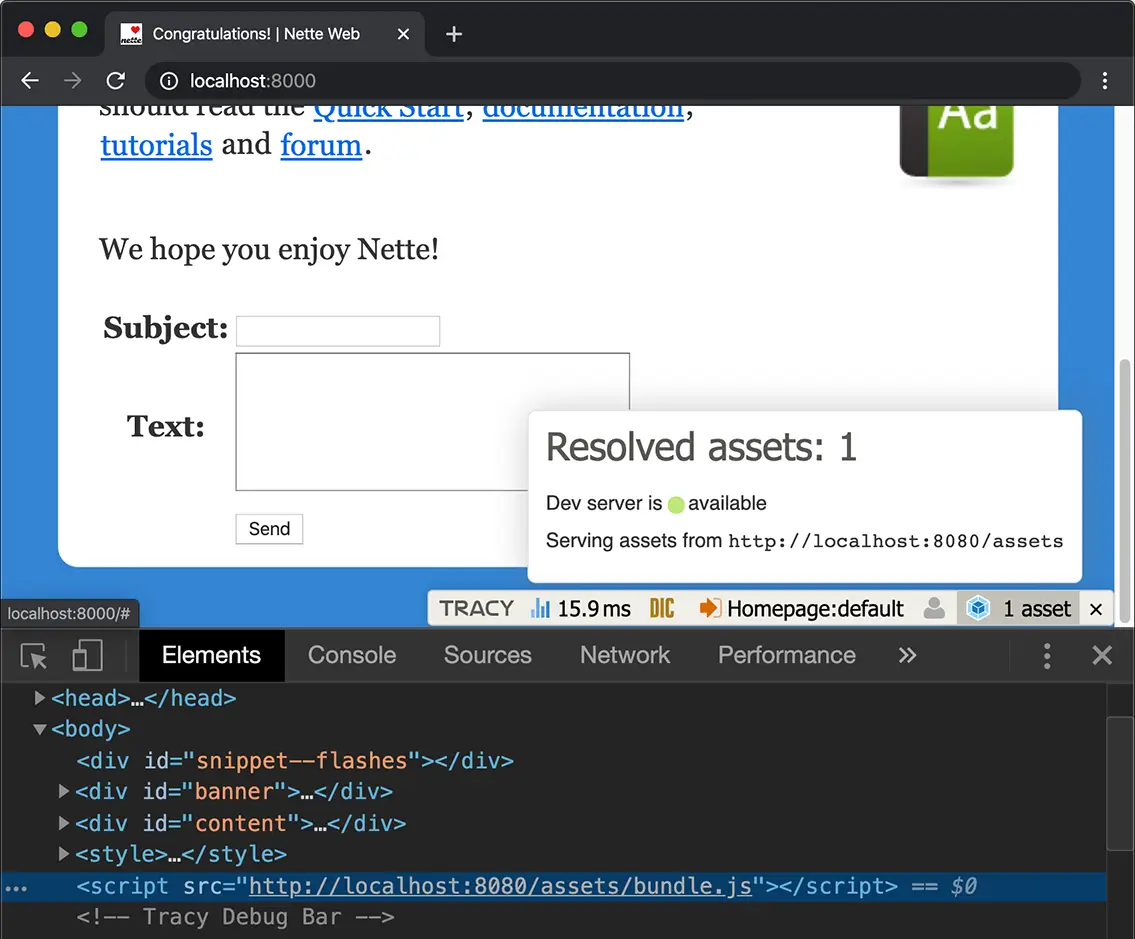
To solve such a dilemma a Nette extension was created by Jiří Pudil which will do smart switching between two for you. If dev-server is available, it will instruct Nette to serve bundle provided by Webpack's dev-server. If the dev-server is not reachable, it will failsafe to bundle sitting on the filesystem.
The magic ingredient is the new latte macro that contributte/webpack provides
for you. Change link to bundle in @layout.latte as
shown below:
	{block scripts}
-	<script src="{$basePath}/assets/bundle.js"></script>
+	<script src="{webpack bundle.js}"></script>
	{/block}
Now install the Nette extension:
composer req contributte/webpack
The last thing to do is to add this configuration to your
config.neon:
extensions:
    webpack: Contributte\Webpack\DI\WebpackExtension(%debugMode%, %consoleMode%)

webpack:
    build:
        directory: %wwwDir%/assets
        publicPath: assets/
    devServer:
        enabled: %debugMode%
        url: http://localhost:8080/assets
You can observe how the extension is selecting the correct way of linking bundle for example in Chrome dev tools. Also notice that extension adds nice panel into Tracy debug bar:
Webpack is a powerful tool to bundle frontend scripts. With the help of the community, we can unlock the full potential of Webpack and its dev-server in Nette projects.
Leave a comment if you have any questions.


Comments
Really nice article, thank you 😄
Brilliant
Sign in to submit a comment